Followers

Showing posts with label cricut. Show all posts

Monday, 13 February 2012

Love is...

...in the air.

That was the challenge over at "CDAC" for their Progressive Challenge number 11. The image I have used was a bonus digi provided by the lovely folk over at SEW MANY CARDS.
A simple easel card made from Kraft CS. A bit of embossed gold card. A Cricut die-cut heart and the SMC image.
The image has been coloured fairly simply with Copic pens and then blinged-up with some crystal stickles.

I can't believe we are at the middle of Feb already - where does the time go?....................

Monday, 25 July 2011

Last week was certainly...

...Christmas in July.

WARNING: Lots of photos so you might want to grab a cuppa before you go any further LOL

In addition to various challenge sites setting Christmassy themes, the folk at Catch the Bug had a week long challenge and a blog hop - and the folk at Wild Orchid Crafts joined forces with Lili of the Valley to have their own Christmas event. On top of this I won two lovely prizes which made it feel even more as if Christmas had arrived early.

However, if that wasn't enough...last week was also Dawn Bareham's monthly 'all-day' card workshop and if you haven't already guessed, the theme was Christmas in July - go figure LOL

As always, Dawn had some lovely creations lined up for us and we started with...
...a box...but look what is inside...
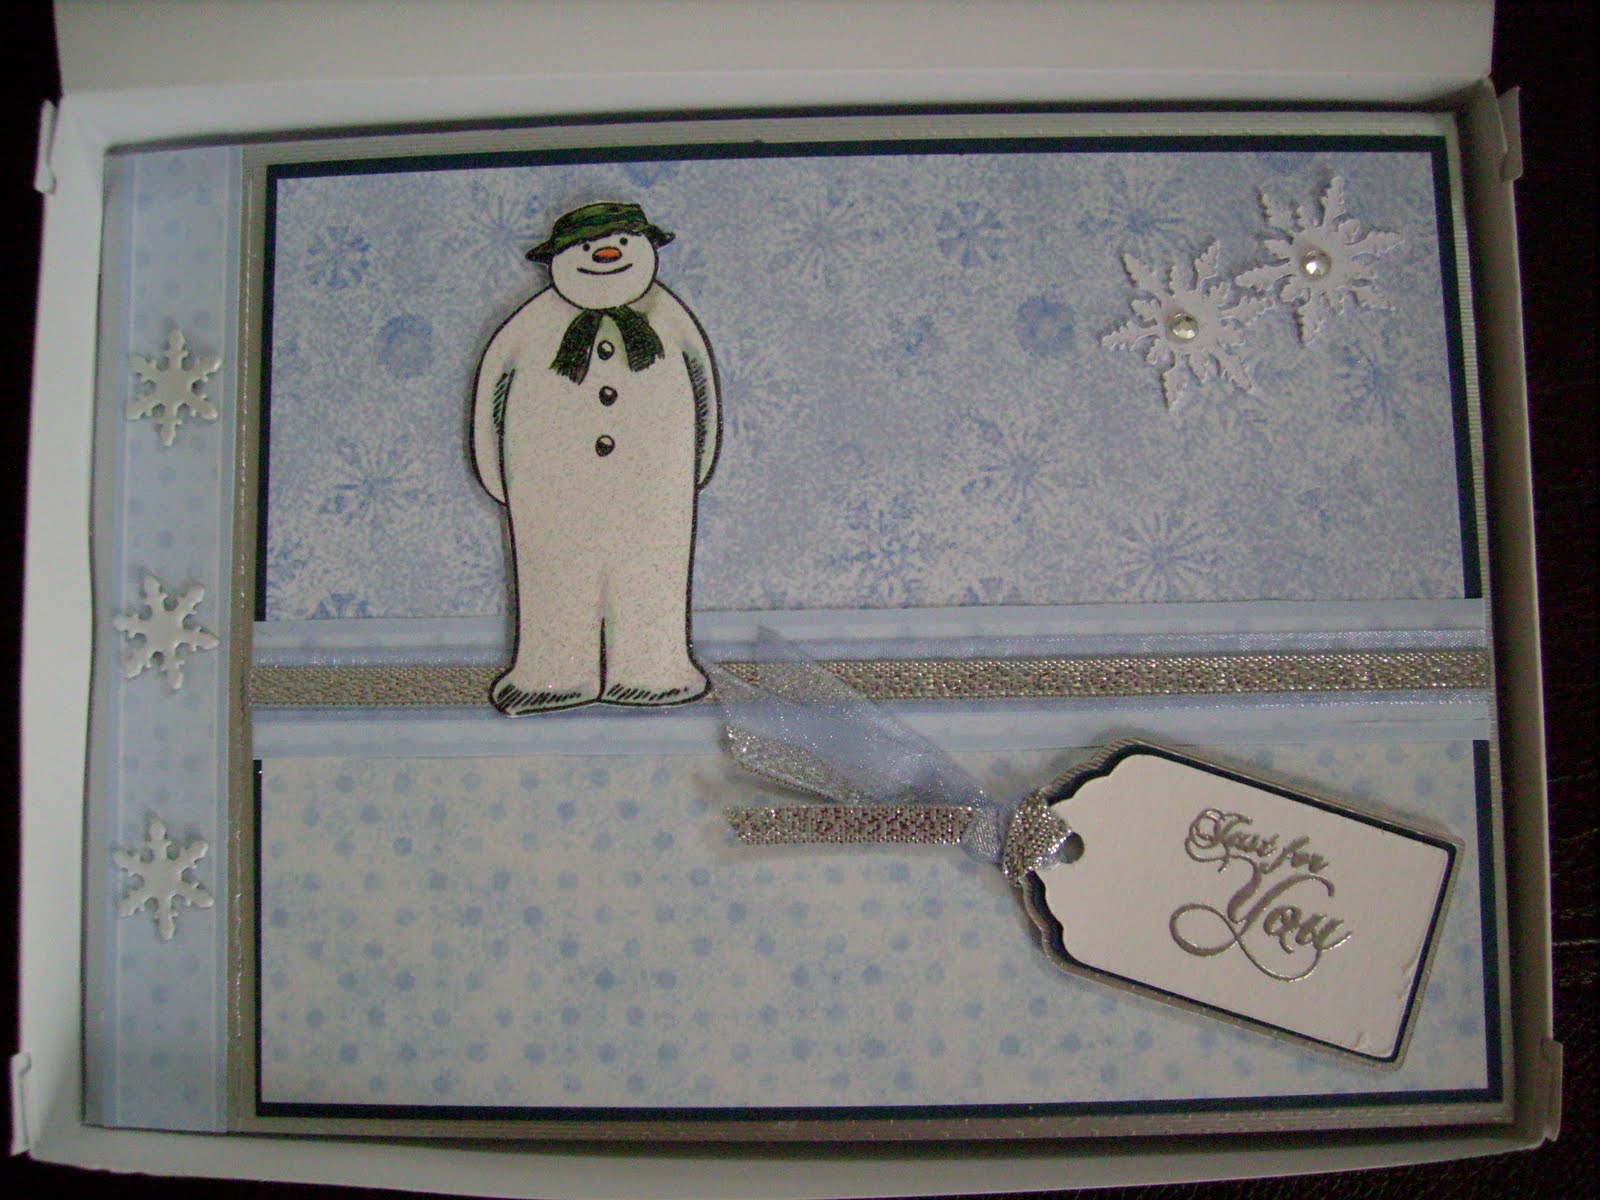
...a 'Snowman' book-style card.
The first two pages have phrases from the song 'Walking in the Air'.
They also have framed openings leading the eye through to...
...the decoupage scene on the back page. Although there was quite a bit of work to this card & box it was actually quite simple...but oh how lovely the finished item is. This is where it becomes difficult to even consider giving these cards away.

The next card was a triangular card made from scratch.
Now I am not, and never will be a great fan of the process of hand-cutting decoupage but this was the second card of the day and the second one where I had to cut out the decoupage bits...
...but I have to say it was worth it. My photos probably don't show the detail well enough but the Teddy & parcels at the foot of the tree do look rather effective.

Dawn's workshops always involve learning something. Sometimes it is a crafting technique or as with this time - the construction of different style/shaped cards.

The third card was based on a easel card but not only was it on it's side...
...it was also scored into 3 sections instead of the normal two.
When stood-up the card gives the effect of a bay window.

The final card was fiddly - not because of it's make up but because despite a brand new blade in the Cricut the doily design just did not want to cut so we all ended up cutting the design by hand.
This card is a rocker as the main part of the card is a shaped circle folded in half.
The decorative panel is mounted onto the rocker and all the edges of the red & green CS were inked gold.
The sentiment on the front was printed onto a tag and heat embossed with gold.
The card was finished off with a simple printed panel on the inside.

It was a fabulous day as usual and very busy. However, these workshops are always fun and it is great spending time with 'like-minded' folk and at the end of it coming away with four lovely cards............................

Tuesday, 12 April 2011

From time to time...

...I think about all the equipment I have acquired for my crafting.

I dread to think what it would actually cost to start all over again as I have noticed that prices have increased on many items since I really started to spend more time paper crafting.
I still think one of my best investments has been my Copics. I love using them and could easily spend hours just playing and colouring-in. As I have mentioned before, this is something that I enjoyed doing as a child and these pens have brought this enjoyment back to me. There are times when I just can't be asked to sit down and 'craft' but to sit comfortably on the sofa with some sheets of stamped or digi images and just colour...well that can be pure bliss.
I have a number of bigger items of crafting equipment - something I have been very lucky in and I don't underestimate the thought that went into providing me with these items. Most of these pieces - such as my Cricut and Bigshot - have been gifts from my Mum. I really think she gets as much pleasure out of seeing what I have created with these items as I do playing with them.
There was a time when punches were probably my least favourite crafting items. I think this was because the only ones I ever saw were the 'button' style ones and I always found these really difficult to use. Things started to change when I bought my first border punch - Fiskars, Threading Water - I had seen this used in so many magazines and I was so frustrated at not being able to get my hands on one (everywhere sold out as soon as their stock arrived - it was a pretty popular item). Like many new toys, this was in constant use for a good while and is still one of my favourites...then I discovered Martha Stewart and EK Success. My first "Martha" was the Doily border punch but my collection has grown somewhat. I would say, if funds allowed I would certainly have many more, especially the 'round the page' designs.

Like many paper crafters I dabbled with stamping when I started but was never that successful with the wooden block stamps (lack of confidence was probably the main cause). The introduction of clear stamps brought me back to this area of crafting and whilst I would still say I'm not a confident stamper, I do now enjoy it and have collected rather a lot...

However, there are also many tools that I have that I probably don't give much thought to but would be lost without. My trusty X-cut pokey tool, my little non-stick "Tesco's" scissors, assorted craft knives, corner rounders...the list goes on.

Could I ever choose just one or two of these pieces of equipment - no way! - each has proved its worth to me and meets my crafting needs. Could/would you honestly be able to give up your crafting equipment and just retain a couple of chosen pieces?

Now if you were to ask me what my favourite pieces of equipment are - that's easy...embossing folders, inks/sprays, punches, stamps and of course, top of the list - my Copics..................................

Saturday, 5 February 2011

How was your day...

...mine was fab!!!

I've had a wonderful time - 6 hours of playing in a Tim Holtz style.

This was the result...
A shadow box with a clock image demonstrating a number of different techniques. The box should have been crackled but mine decided it didn't want to crack...except in the middle where the clock face went...typical **rollseyes**. However, PVA glue has formed ridges in the metallic top coat of paint that makes the box look more wooden. I'm really quite pleased with the finished effect.

Would you believe that this started out life as a cardboard box that had been the packaging for craft supplies...a cut out panel to create the frame, a coat of Ranger acrylic paint in Espresso, a layer of PVA glue covered in bronze metallic paint - attacked with a heat gun to speed-up the cracking and that was the shadow box.
The flowers were created from petals cut on the Cricut (can't remember the name of the cart - think it was 'Mother's love' or something similar). They were cut out of glossy paper and then inked with Adirondak alcohol inks in Mushroom & Espresso. The leaves were cut from green bazzill using the Sizzix "Tattered Leaves" and inked with a Distressed Ink pad in Frayed Burlap. All the elements were given dimension by curving them over the edge of the table and then assembled in place using Pinflair glue. The centre of the flowers were finished with some flatbacked gems.
The clock-face was cut from a sheet of 12x12 colour core card from one of the new Core-dinations stacks. These are lovely as they are already embossed (all over or just in specific areas) and can be sanded to give even more interest to the surface. My sheet had family members scattered all over it...Mother, Father, Aunt, Grandmother etc. After sanding I inked the edge of the circle with more of the Frayed Burlap and also brushed the ink over some of the words to make them stand out more. The numbers were wooden shapes that I inked with a Hazelnut Adirondak ink pad - then to give them an aged look Zig glue (the blue stuff that goes clear) was applied randomly and gold leaf flakes applied to this. The numbers were attached to the clock face using Glossy Accents. The clock hands were cut on the Cricut from miri card and then leafed in the same manner but using a tape runner to apply the 'sticky'. The completed face was mounted in the box using Pinflair glue to raise it slightly from the background.

I really enjoyed this project - there were 7 of us in Andy's class and every box came out completely different because of the colours folk chose to work with.

The only problem I have now is where do I put it as it is quite big.................

Tuesday, 1 February 2011

It's Tuesday and...

...Scrappy night has resumed.

A small group of us meet up at our friend Diane's on a Tuesday night to have a bit of a scrap and a natter...an enjoyable way to pass a couple of hours. Due to Christmas, colds, weather etc. this has been the first get together since well before Christmas.

It was lovely having a chat and catching up on all the goss...

I took the opportunity to have a play with the sheet of miri card that I die-cut the other day using the cart - Love Struck.

2 hours of fiddling around with a pokey tool and I have come to the following conclusions...

1. Love Struck is a beautiful cart but the designs are too intricate to be done in the smaller sizes.
2. Miri card isn't ideal for anything this small and intricate.
3. Make sure there is a new sharp blade for the craft knife to assist with the pokey tool.
4. I need to play a bit more to get to know these things LOL

I did put together a very basic Valentines card using one of the fancy hearts and the word love. Love was glued directly to the card whilst the heart was raised slightly using 3D foam pads. The base card was a pearl cardstock which I punched down the side with one of my Martha Stewart border punches. A panel of the red miri inside the card shows off the punched design to good effect.

As you can see, I'm still on that learning curve with my Cricut but at least I'm trying (I know...very trying LOL) and the thing is being used...............

Sunday, 30 January 2011

Hope you don't fall off your chairs...

...a layout is on the way LOL

I know...shocking isn't it and not just any old LO - this is the second one this year. TWO in a month...what could I be thinking LOL

I have to say, the idea for this LO came from t'internet but just where I can't remember so sorry for not giving a name to credit this against...I really do blop far too much and get myself lost from time to time.
You might remember this photo from some 'playing' I did within Picasa3 a short while ago - I thought it suited the title I had in mind.

The title was cut on the Cricut (yey...it's getting used) using the George & Basic shapes cart. I cut the letters in a very similar colour to the background PP and then cut a shadow in white. The lace circles are paper doilies that I got from Poundland. The back one was brushed with "Broken Glass" distressed ink and the top one left plain.
The red flowers were a mix of paper blooms and dimensional stickers. Silver coloured brads were used in the centre of the paper blooms so that they co-ordinated with the stickers. The journalling was written on a punched oval that had been edged with the "Broken Glass" colour.
The red flowers highlight the fact that only Santa remains in colour in the photo. The icicles were hand cut from white glitter card and stuck just behind the bottom of the photo.

There is quite a bit of bling on this LO. Red gems have been used to continue the red highlights and ice blue gems have been arranged in swirls to give a bit of sparkle without standing out too much.

Oh, and why that title...well knowing my limited techiness with PCs I thought it was magic that I had managed to achieve the combination of B&W with a spot of colour......................

Monday, 24 January 2011

Time to play...

...with my Cricut.

...and this is what I came up with...
The word "Kiss" is from the limited edition cartridge Love Shack and was cut at 4inches.

Now all I need to do is find all the other cartridges that I put away for "safe keeping" whilst my 'bug' was confined to its box LOL....................