Followers

Thursday 30 June 2016

Just a few...

...more cards.

These are still a "work in progress".

The Sarah Kay image was mounted on a fairly neutral background...
 ...but the layering mount picked out the colour of the sweater on the image. I managed to match up some ribbon for this card - it was called 'rust' on the label but it is a sort of 'dirty red' which I think will work very well.
Next up are two of the Mo Manning stamps that I had coloured previously...
...and the first uses two PPs from the Nautical pack that I picked up from the Range - picking out the red/white/blue scheme of the image. The second uses some of the red PP for the matt...
...but the background is a softer PP from one of the pads I picked up in Poundland.

Now I just need to have a rummage through my stash to see what suitable embellies I can find..............................................................

Wednesday 29 June 2016

Some of the...

...knitted bits for the fund-raising.

First up we have a little cardigan for a tot...
 ...lots of happy bright colours. The colours follow the rhyme that I learnt from a cousin - "Richard Of York Gave Battle In Vain" - Red, orange, yellow, green, blue, indigo & violet.
Next up we have a bit of fun for the breakfast tray...
...sparkly pink for a little princess or for the Marmite lover...
 ...these colours match the jars.
As the fund-raising is for the R.N.L.I. I thought we should have some...
...Red/White/Blue - very nautical & patriotic. Whilst the baby blue set is slightly more neutral...
 ...and will probably suit folk who want to be a bit more colour co-ordinated.

But it isn't just the eggs that get to keep nice & cosy...
 ...there are a few Mug Hugs...
...very quick and easy to make...
...and great for using up more of those odds & ends of left-over yarn.

The knitting is continuing and there will be some more colourways to share with you if you pop back.................................................................

Tuesday 28 June 2016

A couple of the cards...

...I made at the crop.

Using two of the coloured images that I've previously shared with you, I made two very different cards. Neither is completely finished as I haven't added a sentiment and I can't decide what sort of embellies to use.

Here is the first one using PPs from "Nautical Rose" (a 12x12 paper pack that I picked up from the Range - just £2.99 for 24 sheets)...
...the red/white/blue went well with the colours I had used on the image.
The second one was a lot softer...
...and for this one I used some PPs that I picked up in Poundland. They had four different colourways and each pad contains 32 sheets of 6x8 (approx.) PP. The weight is 200gsm so this is a lovely weight for matting & layering or even a bit of construction.

I'll share some more of the cards another day......................................................

Monday 27 June 2016

We have a...

..."totaliser".

A colleague suggested that we should have something visual to show how we were doing towards our £150 target for the R.N.L.I. fund-raising. So using what was available at work and some PPs, this is what we came up with...
...it didn't photograph very well because of the lighting and it isn't anything amazing (best we could put together using flipchart paper, permanent pens and some lettering - sorry; no sticky backed plastic available LOL). As you can see, we are almost at the £50 mark after just a week.
My friend Simon has an allotment and he donated two trays of tomato plants...
 ...and since tacking this photo we have now sold about half of them...
...so a big thank you to Simon (and his Dad who helped deliver them to the office).

The craft bits & pieces are growing and I think we will soon be able to hold our craft sale - I've been packaging the stuff so that it is easier to deal with and I'll show you what we have later in the week.

Let's hope the tomato plants survived the weekend...................................................

Sunday 26 June 2016

Saturday crafting...

...at the Toby carvery.

Saturday was Carol Whalley's crop at the carvery in Southend - it seems ages since we last had one of these (the last one got cancelled). As usual, we set up our crafting gear in the function room upstairs and spent a lovely morning crafting and chatting before venturing down stairs for lunch.

I'm not very good at arranging my food artistically...
...as you can see LOL.

 Debbie & Suzie were merrily tucking in...
...after 'snapping' photos of their plates and Alison was doing likewise...
...both she & Suzie were sending the photos to friends/family - mainly to show the size of those Yorkshire puds.

Now normally I wouldn't have a sweet but there was an offer and it would have been rude not to take advantage of it...
...all four of us opted for the Terries chocolate orange sundae - and very nice it was too.

To be honest, I think we all just wanted to find somewhere to have a snooze after that lot LOL

Back up stairs we all got stuck into our crafting and it was quite a productive day.

I'll show you what I got up to once I've had a chance to take some photos. Enjoy your Sunday.......................................................................

Tuesday 21 June 2016

A year has passed...

...since I sadly said good-bye to 8 of my staff.

The 31st May 2015 was officially the last day of service for eight members of my staff as my business stream had taken the decision that there was no longer a role for our lowest grade of staff.

It has been a difficult year, dealing with the loss of over half my team and trying to keep those remaining motivated as they absorbed the duties of those who had gone (as well as continuing with their own roles).

We have had successes - one of the remaining team was promoted and we gained three new staff from business areas that had been disbanded and offices that had closed.

However, it still did not make up for the sadness of losing staff who had been part of my team for a number of years.

On Friday I was able to invite one of my ex-staff back to receive a very special item.

I was able to present the Imperial Service Medal to one of my ex-staff; Anne.

Anne knew she was going to receive 'something' as a result of her length of service but the medal was a surprise...
 ...here she is with the medal. She was so excited & very 'chuffed' and kept muttering "but I don't deserve this".
This is the medal itself...
...it is engraved with her name around the edge and is beautifully presented.

Government employees in the lowest clerical grades can be nominated for this medal once they have left the Department (there are conditions relating to length of service & conduct) and if approved, the medal is sanctioned by HM the Queen.

I felt very proud being able to present this to one of my former staff................................................

Saturday 18 June 2016

Using up...

...those odds & ends.

As a knitter I always have loads of wool about and there are always leftover bits from various projects that get put away. I'm a crafter - I don't like to throw stuff away that might be useful LOL

So with the R.N.L.I. fundraising in full swing I dug out some of the leftovers to see what I could make. Here are a few of the odd balls that were found...
 ...and if you are wondering what the postbox is all about...
 ...I got a couple of these from Poundland to use as collecting boxes. A sheet of adhesive lettering was all that was needed. The R.N.L.I. do provide items free of charge for fundraising, such as buckets, colleting boxes, flags, pens etc. but although they supply them 'free' they cost the organisation so I decided we would come up with our own.

On to the knitting...
...it really doesn't take very much yarn to get started and yet it is using up those odds & ends.
Here is the first item finished...
...an Egg Cosy made out of a very small amount of yarn. This was soon followed by a set in pale blue...
...and even these four didn't make much of a dent in a 50g ball of Double Knit.

The red/white/blue yarn in the earlier photos has produced a set of three (which I will show you when I've stitched them together) and I have plenty of scraps to make quite a few more. I will probably have a play around with colour combos as well to see what I can come up with.

So the craft stall produce is starting to appear - I had better get back to my knitting..........................

Friday 17 June 2016

The R.N.L.I. Fundraising...

...is underway.

We have been planning some fundraising events at work to raise money for the new Wells-next-the-Sea Lifeboat and decided to kick-off with a book sale.

Folk have been very generous with their donations of old/unwanted books...
 ...and we have been able to make a start with a pretty good selection of fiction, non-fiction and gift sets...
...the WRMK Alphabet Punch Board also got another workout.

So whilst the book sale is pretty much taking care of itself, the next step is preparing for the craft sale. We had our first donation for this yesterday - two pretty scarves. I've also been busy with the knitting needles and I'll show you what I've been up to tomorrow............................................

Wednesday 15 June 2016

This was the last of...

...Saturday's colouring.

Another sheet of images that I had stamped ready to colour, many moons ago LOL

This is a Sarah Kay stamp and if I remember rightly she is called something like "Antonia".

The sheet contained 4 stamped images and at some point I had made a start on this one...
 ...but rather than finish her off, I started from scratch and came up with this colour combo...
 ...now don't ask what colours I used, you should know me by now - I just grab colours as I work. However, I was rather pleased with the way the apricot & blue went together which prompted me to try another colour combo...
...this one is red & brown. The colours seem to have worked well together so yet another completed image in my stash ready for turning into a card.

I have a few new stamps that I really must sit down and ink-up at some point - you never know, you might get to see the results in a couple of years time LOL....................................................

Tuesday 14 June 2016

I told you...

...the Copics had been out.

When I got home on Saturday, I had a sort through my colouring stash and found some sheets of images that I had stamped but never managed to get around to colouring. These two cheeky elves were amongst the batch. I can't remember the make or what they were called as I stamped these quite a while ago (and guess what, I've put them away safely somewhere **rollseyes**).

I know Andy at Pinnacle Crafts used these chaps when they first came into the shop and I was probably tempted inspired to buy them having seen some finished samples.

I decided to go with some slightly non-traditional colours...
...and I think the blue & stone work rather well...
...two fun little chaps that are quite quick and easy to colour and I probably will do a few more in reds and greens. We will just have to see where the mood takes me...................................................

Monday 13 June 2016

The Naked Flame...

...is now one of my weekly visiting places.

It is lovely to have a good candle shop within easy reach (although my bank manager would probably disagree LOL).

Ian has now started his own range of candles, as I have mentioned before, and is gradually building up his stock. This is proving to be quite a difficult task as folk keep buying them before they manage to get to the shelves - not a bad thing sales-wise but it hasn't allowed him to build up a display.

He started with the reed diffusers to introduce his range of fragrance and these seem to be going well - I have a Lemongrass & Ginger in the bedroom and a Paradise Beach in the bathroom...both fabulous.

The first batch of candles were in Lemongrass & Ginger and I have to say I adore this scent (I am very impatiently awaiting the next batch to be made as mine is down to the last half inch).

A week ago Ian produced the second fragrance line in his candles - Paradise Beach and I had to give it a go...
 ...the smell is wonderful - it really is like a burst of fresh air whilst walking along a beach...
 ...and like I normally do, this was burnt in the kitchen where I try most of my candles. The scent drifts into other parts of the house and creates a lovely 'fresh' feel. My only criticism of this candle was that it smoked a bit. This was due to the use of a different wick and Ian has noted the results for future production.
This weekend I noticed that some candles had actually made it to the shelves, including a couple called "Wedding Day"...very pleasant but not for me.
However, there were a batch of the next fragrance on the list ready to go...
 ...the "Lime, Basil & Mandarin" had to come home with me and I have been burning it over the weekend - lovely. Not quite as strong a fragrance as the two previous scents I have tried...
...but a very pleasant background fragrance. The wick issue seems to have been sorted too as this one is burning beautifully even with a good (but not excessive) flame and there is no evidence of smoking or sooting.
 
Of the six (now 7 with the introduction of Wedding Day) fragrances that are part of the Naked Flame range, there is probably just one more that I will want to try - "Sandalwood & Blackpepper". The other two are lovely but 'not me' so I don't think "Jasmine & Patchouli" or "Fresh Linen" will be coming home with me.
 
However, I eagerly await a restock of the "Lemongrass & Ginger" as this has to be my favourite so far.............................................................................

Sunday 12 June 2016

The Copics were...

...in full flow on Saturday.

The weather was hazy to start with but lovely and warm so I had intended on spending some time at Barleylands sitting in the sunshine colouring.

The best laid plans of mice & men - as the saying goes.

I forgot it was Farmers Market day...

I did manage to get this little miss coloured...
...this time using greens & lemons but still giving her a 'mop' of ginger curls.

Everywhere was rather busy so I headed off to catch up with Carol (Whalley) and then made my way home - with the intention of sitting out in the garden for a while.

Not to be...

The promised weather front hit early so I battened down the hatches to await the storm and dug out a load more stamped images to sit and colour.

The thunder was pretty impressive but we didn't actually get that much rain. Still, I wasn't bothered as I was merrily sitting colouring. I will share the other images with you over the next couple of days.......................................................................

Tuesday 7 June 2016

The Crochet hook...

...has been getting quite a workout.

With the weather yo-yoing on the temperature front it has been cosy to sit of an evening and crochet - especially as the blankets grow in size because they form a lovely snuggly wrap over the legs.

A short while ago I showed you the 'shades of lavender' blanket (one up from the bottom of the stack). Now look at the pile...
...there is a 'shades of blue' one at the bottom. Middle of the heap is a Summery combo of pink/blue/yellow. Above that is a yellow/green combo and on the top is my current piece. This consists of some pretty glittery yarn in soft shades of green, pink, blue with a black edging. I decided to go for something other than a standard square this time - I created three smaller squares (one in each of the pastel shades) edged them in black and then joined then to form a long rectangle. This is now being worked around in block stripes.

These sorts of blankets are so easy to do as they are worked in treble stitch and grow very quickly.

One of the benefits of using variegated yarn is that you get the shading & colour alterations without having to faff around chopping and changing yarns. There is also the surprise of how the colour combos will work-up as the piece grows.

I am making a bit of a dent in my yarn mountain but I keep seeing pretty new yarns that I want to play with **groan**. I must try to resist and actually work through what I've already got. Problem is, just like with my paper crafting - who can resist pretty things..........................................................

Sunday 5 June 2016

Have you ever...

...taken part in a photo scavenger hunt?

Over at "Rinda's" blog this year's hunt is under way.


I have taken part in this hunt a couple of times, mostly for fun - having a list of things to look out for can be fun in itself.

If you feel like joining in, why not hop over to see what sort of photos have already been shared. Alternatively, if you don't think you would be able to complete the whole list, why not just see what you can find.

Here in the UK we have just had the 'half-term' holidays in most of the schools but there is the main Summer Holidays still to look forward to - so why not set this as something the kids could do during the holiday. A child's "eye" on life is often very different to that of an adult and you may be surprised at what they come up with.

I think I'll just be keeping a copy of this list on me and see what I can come up with over the Summer. Why not do the same - have fun..................................................................


Friday 3 June 2016

So what do I think of...

...the WRMK Alphabet punch board.

It is a very clever piece of equipment that allows you to cut all the letters of the alphabet, numbers and some punctuation symbols.

I've only had a brief 'play' with it but here is my opinion...

When you open the packaging, this is what the board looks like...
 ...it has a cutting area with a grid and cutting tool. A single function punch and a double function punch.
The board comes with a detailed instruction booklet...
...so all you need to do is decide what you want to cut your letters etc. from. Most of the letters are cut from pieces of card 3" x 5" but there are instructions for doing "M" & "W" from a 5" x 5" piece so that you don't have to join anything.
Wandering around the board...
 ...the single function punch cuts a 'd-shaped' piece from your card and there are score marks on the board to help you ensure that you have placed your CS correctly.
The cutting area has a grid that is hinged and lifts up so that you can place/move your CS...
 ...this has magnets in it that help to keep it and your CS in place whilst cutting. The cutter is the small round blue item to the left of the photo and has its own storage area attached to the grid so it is always to hand. When cutting, this little tool slots onto the grid and you have a guide to slide along to create your cutting line.
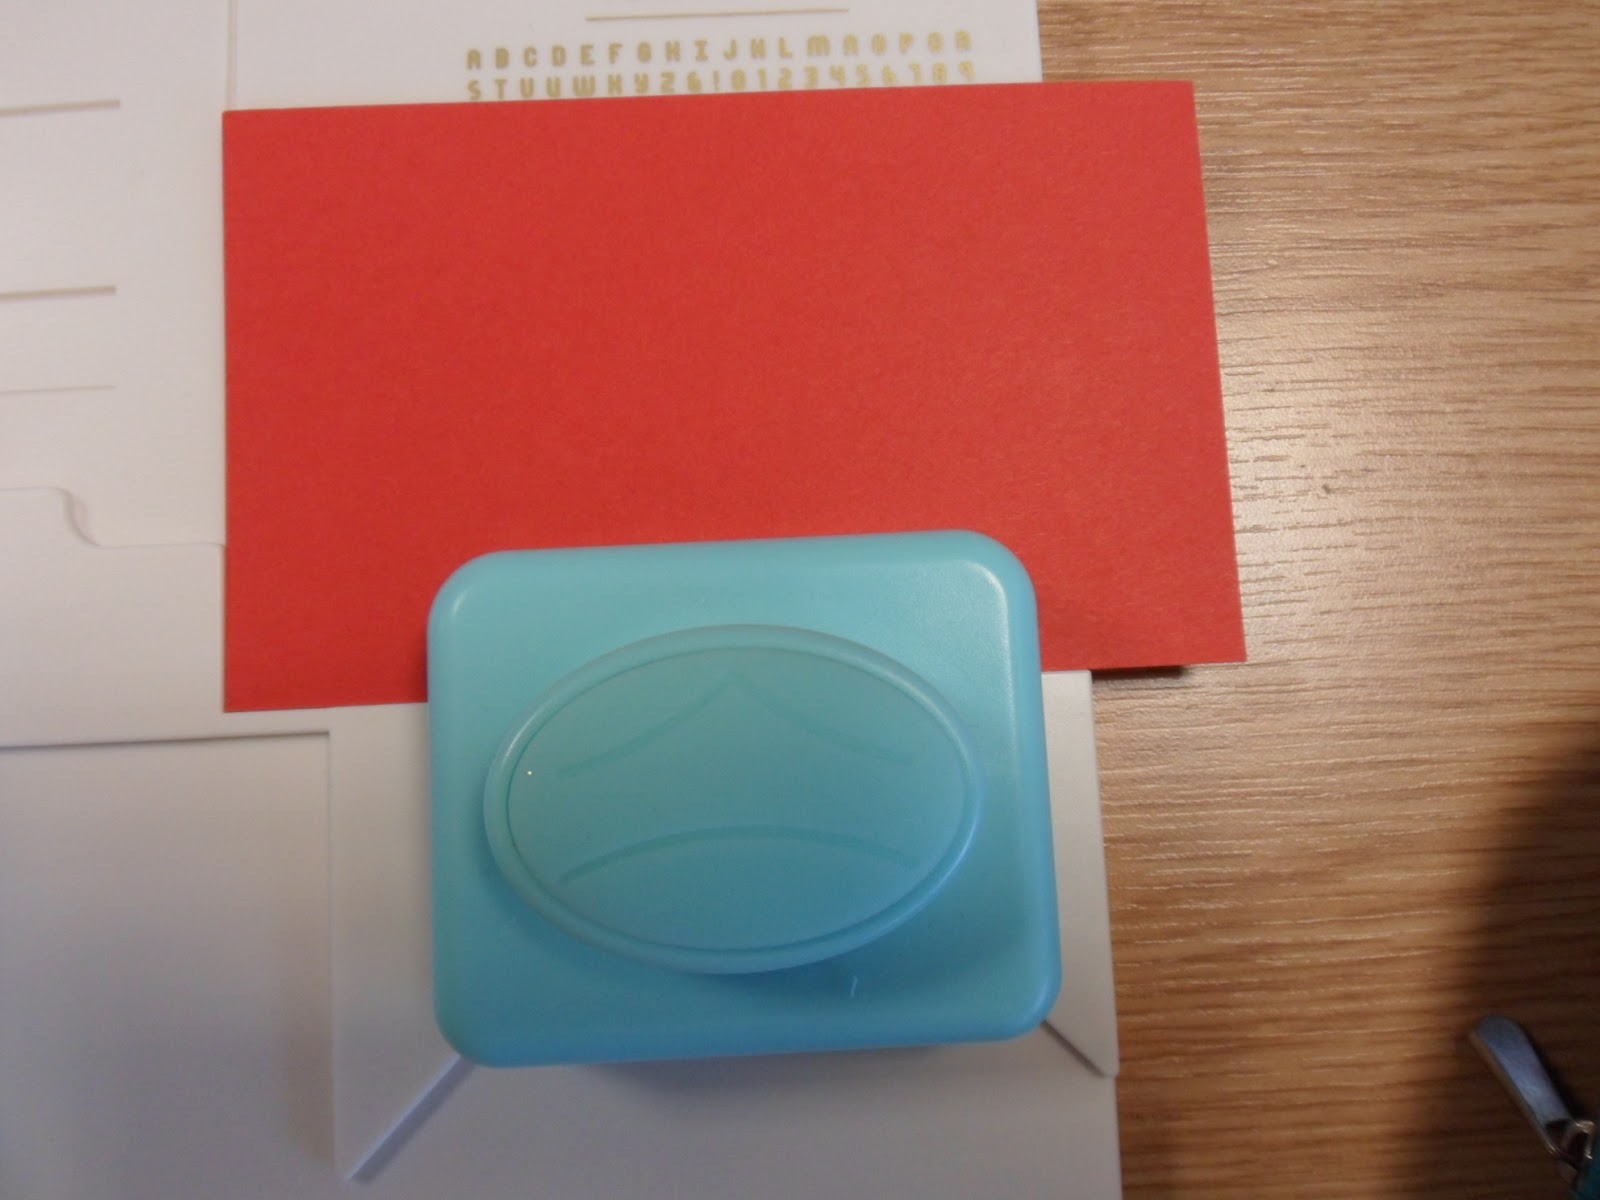
The double function punch has a notched, curved 'v-shaped' cut at the top...
...and the board in this area has markings and raised areas that help you line up where you need your card to be before you 'cut'.
The bottom of the double function punch rounds off your corners...
 ...and works very much like a corner rounder - you slide your CS in to fit snuggly into the recess before punching.
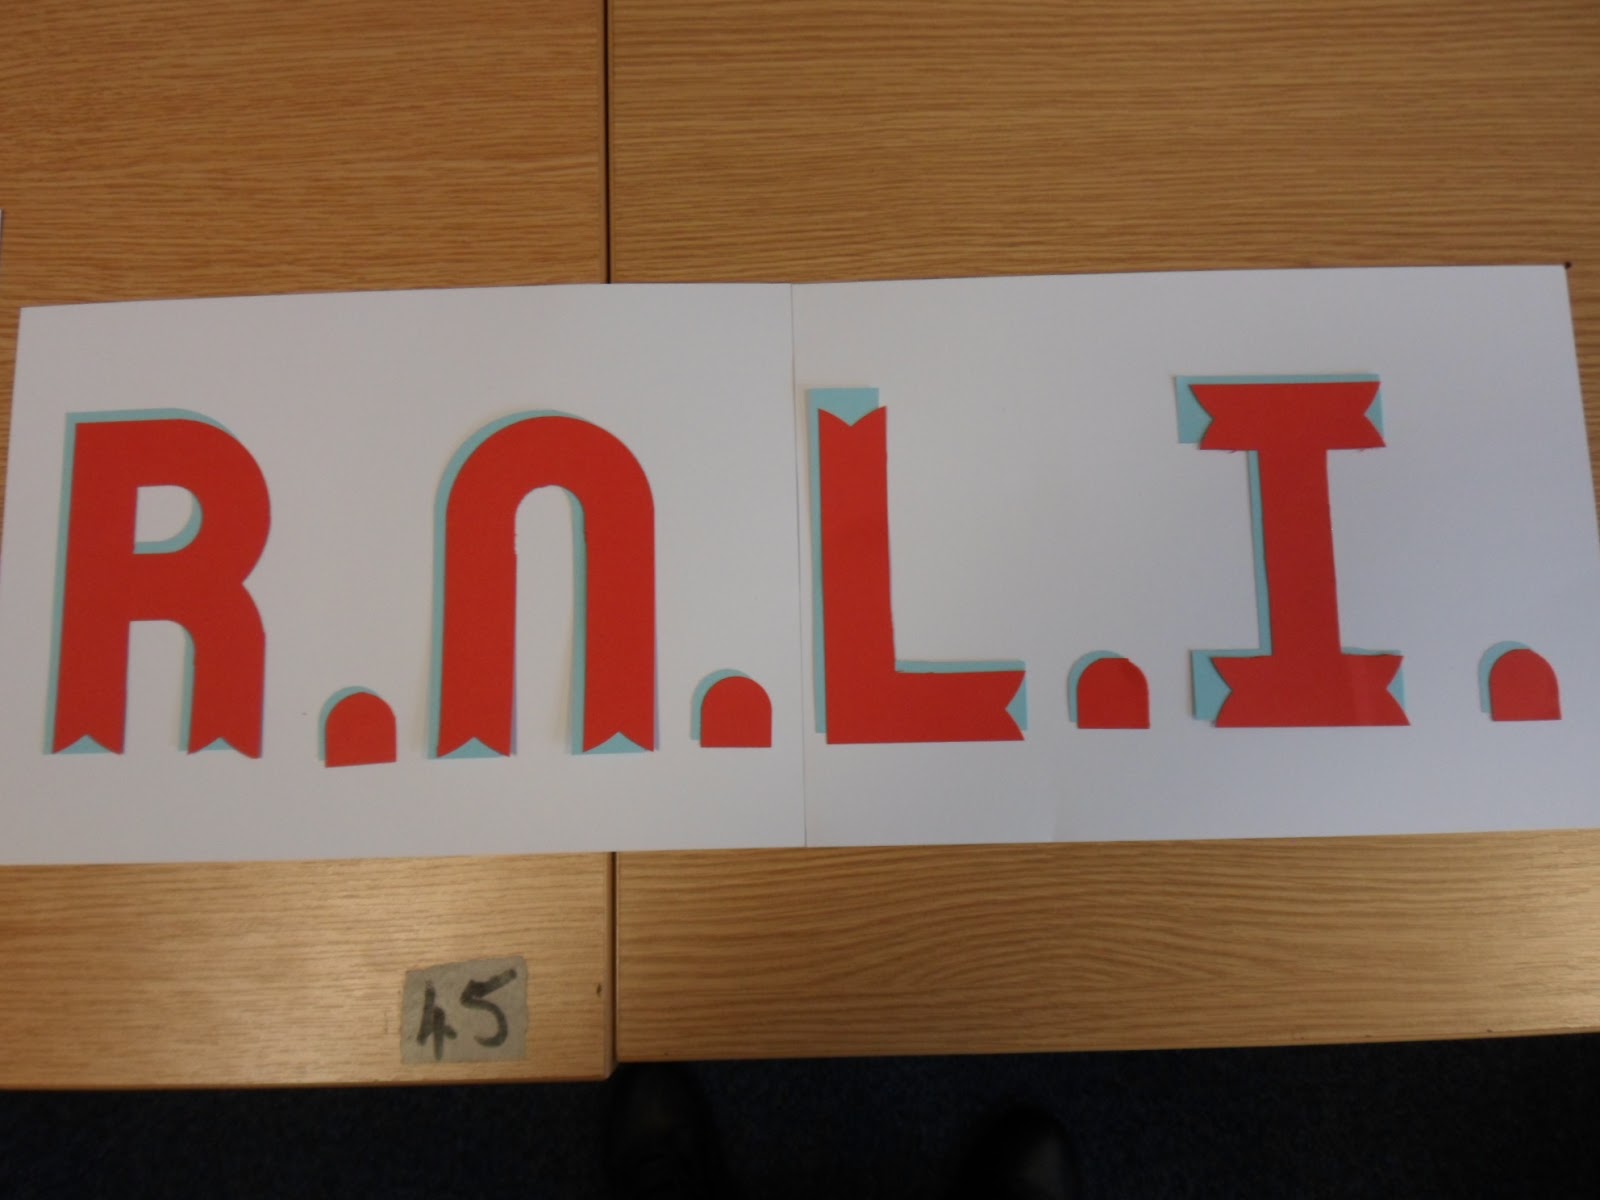
My 'play' was so that I could make some signs...
...I cut everything twice - once in blue (for the shadow) and once in red...
...I also used the curved 'v-shaped' punch to fancy up the edges of the red pieces.

So what do I really think...

PROs
* The letters/numbers are a good size for signs, bunting, scrapbook titles and initial/number greetings cards (you can actually cut letter shaped cards by using folded CS/PP).
* Once you have cut a stack of CS/PP the process is fairly quick & easy.
* The instruction booklet provides details for every letter & number. This is provided in step-by-step pictures of the actions you need to take.
* You can stick with plain style letters or you can pretty them up a bit with additional punching so you have the option of more than one style.
* There are quite a few YouTube videos out there so there are lots of ideas for getting the most out of your board.
* It is easy to use.

CONs
* You need to follow the instruction booklet carefully on some letters. On some of the images the CS is 'grey' - this means that you need to cut from the reverse otherwise you end up with some funny looking pieces, especially if you are using a PP.
* Even being very careful about cutting my CS pieces to the required size, I had a couple of incidents where the cutting on the grid area didn't quite line-up - a craft knife or scissors soon sorts this but you need to know that it does happen.
* The pieces are large - 3x5 or 5x5 so these letters/numbers will not be suitable for all your crafting but don't just think of the pieces as letters. On the packaging is an example of a scrapbook LO where one of the photos had been cut to form the title - so you still have your photo but also the title - two for the price of one.
* This punch board is more expensive than previous boards but then you have more functions, so I suppose it is swings & roundabouts.

At the end of the day, am I pleased that I bought it - yes.

It wasn't something that I rushed into, I thought about it for a few months and my purchase was actually well timed as far as the RNLI fund-raising is concerned.

So if you have been thinking about one of these, I hope my comments help................................

Wednesday 1 June 2016

A New Toy...

...to play with.

The WRMK Alphabet board has been 'calling' to me for a while and as it was 30% off at Pinnacle Crafts Members Weekend, I treated myself.

Here it is...
...and it is coming to work with me today to get a bit of a 'workout'.

I am organising a number of fund-raising events over the coming months to help the RNLI celebrate 150 years of protecting folk. They are aiming to raise enough to buy a new Lifeboat for the Wells-Next-the-Sea lifeboat station. I have planned a book sale, cake competition & sale, a raffle, a craft stall and will probably come up with a few other ideas as I go along.

I thought the alphabet board would be great for making some topical signs & bunting. I'll let you know how I get on................................................................