Followers

Wednesday 29 June 2011

This is the little box of tricks...

...that has made me so happy.

It is so 'diddy' compared to my 'Old-faithful'.
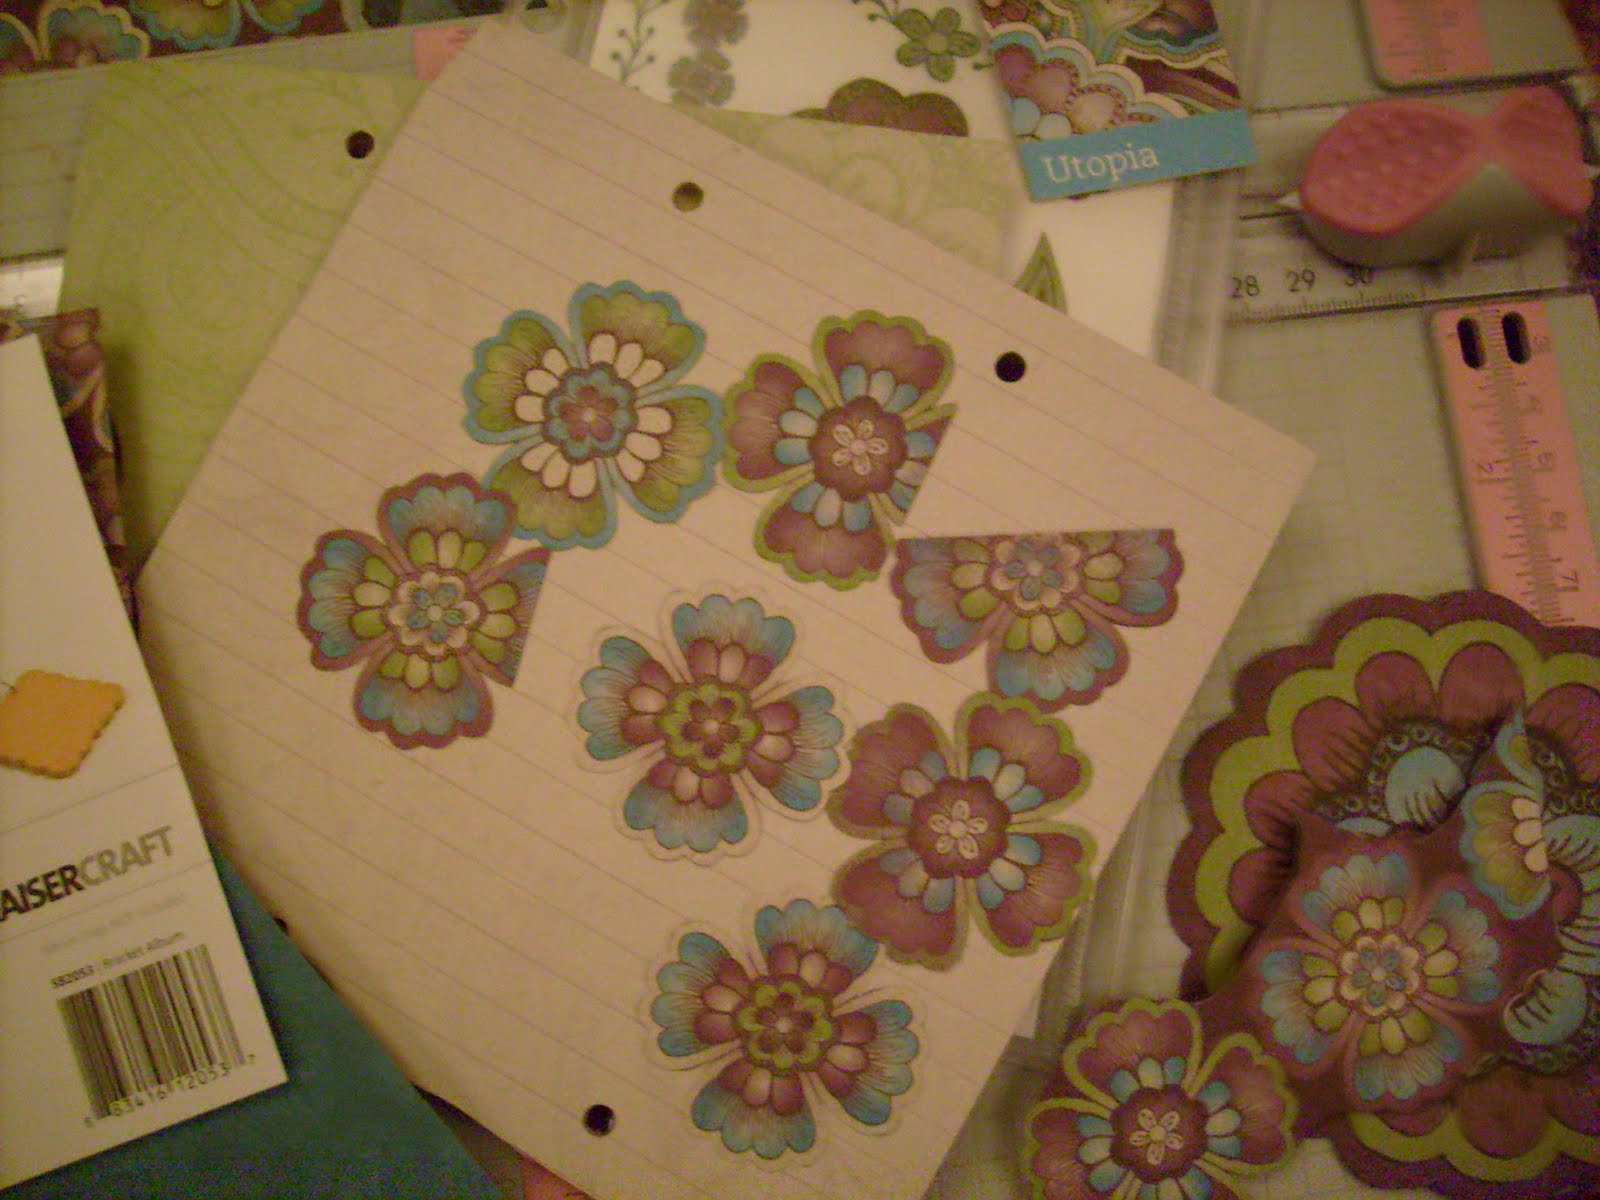
It is sitting next to a K&Co box of 12x12 papers and album - so you can see how tiny it is.

I've no idea what the 'spec' is and to be honest I really couldn't care...IT WORKS...that's all I am concerned about.

Gosh I never thought I'd see the day I got sooooooooooooo excited over a PC LOL.......................................

I know the photos are appalling...

...but to celebrate being back in Blogland I just had to show you what has become a 'work in progress'.

Back on Friday I shared with you a wall hanging that I had made to participate in a couple of challenges. Well at the time I did mention that there was a 4th panel that I wasn't sure what to do with...the hanging now includes this panel.
I have also decided to add Tilda/Edwin images to all of the panels.
The two panels with the sitting Tildas are now finished but I'm still thinking about how to decorate the other two panels now the stamped images are mounted on them.
I think one thing I have learnt from this pic session is DON'T TAKE PICS OF THINGS ON A YELLOW PAINTED WALL WHEN THE LIGHT IS NAFF - it looks like it is suffering from flash bounce-back LOL...Still, at least I now know how to work this PC and I know I can import pics. Yipeeeeeeeeeeeee, one very happy bunny here..................................

"Happy, Happy dance"...

...I'm back - yipeeeeeeeeeeeeeeee!!!

My poor PC was 'dead' so I've been informed and has been taken away to be rebuilt and have my data retrieved. In the meantime, I have been given a PC to use and it has been set up with all my basic needs...I just need to find my way around and actually locate them.

The PC itself is quite a niffty little thing and a fraction of the size of my 'old-faithful' and it looks like the SD reader is built in so that should be interesting LOL

My first port of call though is hopping over to all the blogs that I haven't been able to comment on and catch up with everyone.

See's you all laters.......................................


EDT: Oh how rude of me, I should have mentioned that whilst I was "away" I gained a new follower - welcome and thank you so very much for deciding to join me here in my little bit of blogland.

My PC is not well...

...in fact it may even be terminal (no pun intended LOL).

I got home from work yesterday to find a very lifeless heap sat on the corner of the desk - no matter what I did it just didn't want to boot-up.

Returning from Scrap night, I tried again - repeatedly - to get Windows to activate but nah...zilch...nadda **sob, sob** and as I'm not exactly 'techy' in the PC department I gave up.

I did try again this morning but despite a lot of whiring and blinking lights, nowt happened.

So for the time being Blogland I am PCless so will not be able to post any pics, enter any challenges or leave comments on most of the blogs I follow "grrrrrrrrrrr". The PC at work allows me to keep up to date with what is going on out there in Blogland but that is about it (very restrictive service availability).

So please don't think I've suddenly gone AWOL or that I'm ignoring you - I'm not, honestly - I'm just without access at the moment. It is soooooooooo frustrating not being able to keep in contact with all my bloggy friends.

Hope it isn't too long before I can get back to Blogging normality..................

Monday 27 June 2011

Hooray for the...

...Red, White & Blue.

Well that's the theme over at "Kenny K's Krafty Girlz Challenges" for this week - why not hop over there and have a look at the things that the new DT produced.

This is my entry to the challenge...
I went for a tent-fold from a sheet of A4 leather effect blue CS and attached a large panel of paisley PP (Costco - 300 sheet 12x12 pack). The Kenny K digi image was coloured with Copic pens.
I made use of two of the ATC size marbled panels that I made on Saturday. This one was done on matt white card...
...and this one was done on glossy white card.

The technique used to achieve the marble effect was shaving-foam and Adirondack inks. The foam acts as a medium to hold the ink so that you can swirl it around or just blob it before laying the card on top and gently pressing down. Very messy but an effective way of playing with inks.

The coloured image was attached over the panels and some R/W/B card candy was used to embellish.

Hope you like it.............................

Sunday 26 June 2011

Have you been roasting too...

...gosh it's been hot here.

We Brits are never satisfied with the weather - never mind what it does. Today the temperature where I live has been 80 degrees (F) that's 27 degrees (C). We also have a habit of using the F temperature scale when talking about heat because the numbers are bigger and make things sound hotter and we use the C scale when talking about the cold because the numbers are smaller and make us 'think' cold...strange; aren't we LOL

Anyhoo...with this in mind - the heat I mean - you may be surprised to see that I've made a Christmas card...no please don't choke on the ice in your Pimms - I really did say CHRISTMAS CARD. Here it is...
The design is using this weeks sketch over at "Less is More" and I will also be entering it into the "Creative Craft World" Christmas in June - Card Crazy Challenge.

The card is 6x6 smooth white CS - tent fold. The coloured strip is dark blue Bazzill CS and the snow flakes are Glitterations. The sentiment was a silver peel-off coloured blue to match the bazzill, using my Copics (I didn't have a suitable small stamp).

There are some lovely DT items over on both these challenge sites so please do hop over and have a look...or better still, why not play along....................

Saturday 25 June 2011

Evening everyone...

...the sun is actually out creating a beautiful end to a lovely day.

I've been busy playing...

I have spent the day over at Pinnacle Crafts attending one of Andy's "Tim Holtz style days" - lots of lovely ladies to share the crafting experience with and lots of products to play with.
I went prepared LOL

Andy now includes a note on the lessons list that 'old cloths, aprons, gloves etc.' are to be considered as the materials used will involve MESS
All the techniques tried were used on ATC sized pieces of paper and card.
We played with the new Distress Inks, Distress Ink pads, Adirondack Inks and Ink pads. Embossing, De-bossing, Marbling and Stamping. We used greyboard, glossy card, matt card, foiled (not miri) card, Kraft Resist papers and a variety of dies & embossing folders.
Playing with colour combinations is one of the great things about Andy's classes - he lets us try anything we fancy...something we probably wouldn't do at home a) because we wouldn't have the range of products and b) we would probably be concerned about wasting stuff.
Of all the ATC sized pieces that we ended up with we chose 8 to mount on a display board (a sheet of A4 greyboard covered with Kraft resist paper that we had coloured however we wanted.

We all had a lot of fun and despite the gloves I did manage to get ink on my hands, fingers and up my arms but not too much LOL

Thank you Andy for another wonderful 'play-day'.................................

Friday 24 June 2011

Tilda, Butterflies and...

...a bit of Summer Fun.

I used the KaiserKraft Bracket Album pages to create a wall hanging and I think this will meet the requirements for both the "TOMIC" challenge #3 and the latest "Just Magnolia and hAnglar & sTanglar" challenge for week 112.
The challenge theme for TOMIC is 'Summer' either summer themed stamps or the word summer somewhere on the project. For Just Magnolia the theme is Butterflies.
The first panel has a mix of hand cut flowers from one of the Kaiser Utopia PPs and buds & blooms from various sources. Flat back gems & pearls were used as flower centres to add a bit of bling and Glitterations letters were used to 'spell-out'..."Summer Fun".
The bottom panel has Tilda sitting on and surrounded by more flowers - with a couple of Glitteration butterflies.

The photos aren't the best as it was difficult finding somewhere to take decent pics at around 10pm in the evening. I had to get this photographed and posted tonight as I'm out tomorrow and don't think I'll have time to do it then.

The Kaiser album had 4 pages but I couldn't think how to decorate the extra page LOL. It is something I can always add at a later date - if/when inspiration strikes.

If you are wondering what other folk have come up with for these challenges, do hop over to have a look - the links are above..........................

Thursday 23 June 2011

New goodies...

...to play with.

Tonight was week one of the latest 4 week crop session and this is the stash we have received so far...
...isn't it lovely. The PPs are from the KaiserKraft Utopia range and we also have rub-ons, flowers, bling and a bare Bracket album.
As you can see, I've already started cutting out flowers from some of the PPs and I've stuck PP to the pages of the album.
I've decided not to make the album into an album IYKWIM - I intend to use the covered pages to create something else but I'm going to keep that as a surprise for a little while..................

Paper piecing and...

...shades of grey.

This week's challenge over at "Just Magnolia and hAnglar & sTanglar" is to dress-up an image with some paper piecing - not a technique I've ever tried before.

Whilst I was doing something different I thought I'd also have a go at colouring the image with just shades of the cool grey Copics. This was the card that resulted...
The only 'colour' on the image is Tilda's dress & shoes.
As you can see - it creates quite a contrast to Edwin who only appears in grey.
I was wondering if I would actually get this challenge completed as I didn't have any PPs that I thought would be suitable for this size image. Lucky me...I bought the latest copy of 'Quick cards made easy' today and the free gift was a 6x6 paper stack of Pink Petticoat Wild Blossoms - perfect!

I'm not too sure about the paper piecing 'thing' as it seems like a lot of faffing around (can you tell I'm not a scissors & decoupage person - give me die-cut any day LOL) however, it does give a different type of effect so I'm pleased I gave it a go.

Hop on over to the challenge blog (link above) and see what the DT came up with.........................................

Wednesday 22 June 2011

I'm still struggling folks...

..."Clean & Simple" isn't me.

Weird, wacky, frilly, tons of embellishments - now that is me LOL but I am not going to give up. I am determined to persevere and you never know - I might just get the hang of it...eventually.

The week 20 challenge over at "Less is More" is themed MONOGRAM. Why don't you pay them a visit to see what everyone has come up with so far.
For my card I decided to print something off of the PC. I didn't print it directly onto the card because I wasn't sure I'd be able to 'place' it just where I wanted so a bit of 'print, trim & stick'.
I edged the panel with some black Glitterations border strips.
The inside of the card reveals what "M" is for...

So there you have it..........................

Tuesday 21 June 2011

Two for the price of One...

...challenges that is.

Over at "Die Cut Dreams", challenge #92 is a colour combo of RED/WHITE/BLUE which just happened to be the colours I was considering for the sketch challenge over at "Scrapology" for their June challenge. So on this occasion I've been able to sort two challenges with one card - do hop over to these sites to see all the examples that the DTs have come up with.
The basic card follows the sketch layout and obviously you can see that I've kept to the red/white/blue scheme that was required for the colour challenge.
This Kenny K image was perfect for the 'feel' I was trying to get with this card.
I've also been very good using up scraps from previous projects so I didn't have to break into any new stash.

That's two more challenges to tick-off in my notebook........................

Monday 20 June 2011

A Kenny K image...

...Glitteration letters and...A PAPER PLATE!!!

Before you send for the men in white coats let me explain...

Challenge #50 over on the "Kenny K's Krafty Girlz Challenge" blog is themed "Check it Out" - the instruction is to use checks in any shape or form somewhere on the card along with a Kenny K image.

Ta-dah!!!...........
When I read the challenge all I could think of was racing cars and checkered flags but couldn't think how I was going to achieve something along those lines. This morning I popped into the 99p Store and happened to spot packs of partyware on just that theme.
I attached one of the paper plates to a tent-fold 6" sq white card blank. Then attached my Kenny K image (coloured with Copic pens) to the rim of the plate.
I used the Glitteration letters in a mix of upper & lower case to make the sentiment.

Something a little bit different...now what do I do with the other 11 plates........................................LOL.....................

What did you do today?...

...I went out to play.

A while back I booked myself onto a few classes over at Pinnacle Crafts (a mix of short weekday lessons and a few all-day weekend lessons)and today was one of the short lessons.

One of the things I like about the weekday lessons is that it isn't so much about what you make but how you make it - they are a great way to try out techniques and often new products. Today's lesson was to create a quick & easy journal so for some of the ladies the technique was about the construction but there was also the chance to play with the new Cosmic chalk sprays.
The panel on the front was embossed using a calendar embossing folder through a Cuttlebug. The panel was trimmed slightly then using a choice of three colours the panel was spritzed with the spray chalks - I used blue, lavendar & lime. Once dry the raised parts were highlighted using a distressed ink pad - I went with a mauve shade (I really should have noted which colours I was using LOL). The front & back covers were made from two, slightly smaller than A5 pieces of card which were edged using an EK success border punch. The panel was attached and then some random stamping was done - on & off the page.
A large journal page stamp was used to create the note panels for each of the inside pages - once stamped they were trimmed down to ensure they fit.
Distress ink pads were used to colour the pages and I decided to stick with the three colours that I used for the front panel so that it all tied together. The journal panels were then attached.
I used the same stamp that I had used on the cover to decorate the pages.
The back cover was also decorated using the same small stamp.

As these classes are only 1.5hrs long you don't expect to be able to add a lot of detail to something like this but it gives a basis on which folk can add their own ideas or perhaps adapt. I don't think I'll add much more than a touch of stickles just to finish this off but I do quite like the idea of a quick & easy journal and may well have a play at something similar.

Thank you Pauline for a lovely bit of 'play' time................................

Sunday 19 June 2011

Anything but a card...

...is challenge #25 over at Totally Tilda Challenges.

That's right - no cards allowed. If that idea stumps you, hop over to the challenge blog and see the fab stuff that the DT came up with...wall hangings, candles, boxes and a bird house to name just a few.

I decided that Tilda was going to help me get another of my wooden words completed.
Here is my Patch Tilda sitting comfortably upon the word 'create' - apt don't you think.
The word was covered in KI Memories skinny stripe PP. I was so greatful to have my Basic Grey file set to smooth off all the edges ready for Tilda to sit on the 'e' & 'a'. She has her own flower sitting right by her.
A Frayed Burlap Distress Ink pad was applied to bits of the edge - I didn't want a solid line of inking around the word. A mix of blooms were then attached at the start of the word...
...and some more at the end with some tiny satin bows thrown in for good measure.

This came together very quickly and is pretty much how I imagined it would look (that was an achievement in itself as my ideas often suffer from 'leaky elbow syndrome'). It is all ready to be attached to my noticeboard up in the 'craft room'...well the room that should be my craft room LOL

Do take the time to pop over to the challenge blog as there are some super creations there..................................

Organised?...

...well, getting there.

For some time I've been meaning to put together a book of pics of the cards that I've made but you know how things are...all good intentions but life gets in the way and these things never get done.

Back in May I entered the world of 'challenges' and seem to have got quite hooked. Unfortunately, scribbling down details & dates on scrap paper wasn't working for me and I was getting myself in a bit of a muddle - then I found this...
...a notebook I hear you saying with a questioning tone - yep a note book. I know, I have a Bind-it-All and if I needed a notebook I could easily have made one but this was too good to pass by. It is A5, has lots of pages in a good quality paper, wipe clean covers and it was only £1 in the clearance section of WHS. I could never have made one for that.

I can note the details of each challenge as it is posted...
...and when I've completed my item and posted it on the challenge site I can print off some wallet size pics for sticking in the book.

This way the notebook is serving two purposes...
...it is a record of the challenges that I'm interested in (and have entered) and also a record of the designs that I have come up with so that if I'm stuck for inspiration I have something to look at.

Such a simple idea really, but very useful...
...because I can even print-off copies of sketches that are sometimes part of the challenge and then I have that readily to hand too.

Andy at Pinnacles thinks I'm way too organised LOL but hey, it works for me - how do you keep your projects straight? Do you make notes, do you have a book or do you just 'wing-it'? I'd love to know what works for you..............................

Saturday 18 June 2011

Tomorrow is Father's Day...

...and I hope all the Dads out there have a lovely day.

I lost my Dad back in August 1997 but I still miss him very much.

I don't have very many photos of my Dad but these are two that I have on my lounge wall (sorry for the poor quality but the light wasn't very good).

George Henry Korten: 19/9/1920 - 17/8/1997
This was one of my Nan's photos that we all got copies of. The babe sat on Nan's lap in this studio snap is my Dad...Mum has a photo of my sister at a similar age and the likeness is amazing.
This photo is from my parent's wedding. Dad never liked wearing suits but he always 'scrubbed up' rather nicely...LOL

I'll be thinking of you Dad, even though you are not here to share another Father's Day with us....................

Friday 17 June 2011

It's recipe time...

...for challenge #91 over at Die Cut Dreams.

The "ingredients" to use are: -

3 stamps...3 flowers...and a bow.

This is what I started off with...
...3 leaf tapestry stamps, 2 Ranger Distress Ink pads, 2 red rose buds & 1 cream rose held together with a green crystal ribbon bow and a 6x6 white card blank.

This is what I came up with...
,,,a fairly straight forward, simple card.

I used the stamps to create a background for the flowers by lightly marking a circle that I then filled with the 3 different leaf stamps. I stamped first of all with Antique Linen and then use Frayed Burlap over the top.
I placed the flowers so that only the heads were against the stamped background and the bow is towards the edge.

I hope this is okay for the remit that was set.

If you'd like to see what other folk have made using this recipe - do hop over to the DCD challenge blog using the link above............................

Thursday 16 June 2011

A stamp-free post...

...coming up.

I have been so enjoying my colouring-in that it is a while since I made any cards that didn't involve stamps. Yesterday was the craft day run by Dawn (Bareham) and I made these 4 lovely cards...
This trio of Elegant Ladies involved decoupage, doodling, matt & layering and...
...gold leafing. The gold leaf didn't want to behave and a couple of the ladies there ended up 'wearing' nearly as much as they applied to their cards LOL and that wasn't all - trimming the feathers to decorate the cards ended up with us covered in those too...we certainly had a giggle - a great way to start the day.
This twisted easel card was decorated with more decoupage and some Glossy accents but there was more to come...
...the panels were edged with glitter so you can imagine by this stage we were all sporting a mix of gold-leaf, feathers & glitter and sticky/gluey fingers.
Next came a 'Magic slider' card. I made one of these a while back of a Christmas tree but I think I like this one even better. Here we have the outline of a sailing ship...
...and here we have the image in full colour - I do so love the way these work.
To round off the day we made a 'Penny Rocker'. The card is a folded circle so it can rock and on the front is a flower attached to a penny-slider so it can spin and move back & forth as the card is rocked.

I really enjoyed making all of these cards - such a lovely way to spend a day.

All the PPs & decoupage used on these cards came from a variety of CDs.

As we were leaving, Dawn reminded us that next month would be...Christmas in July..........................................