Followers

Sunday, 30 January 2011

Hope you don't fall off your chairs...

...a layout is on the way LOL

I know...shocking isn't it and not just any old LO - this is the second one this year. TWO in a month...what could I be thinking LOL

I have to say, the idea for this LO came from t'internet but just where I can't remember so sorry for not giving a name to credit this against...I really do blop far too much and get myself lost from time to time.
You might remember this photo from some 'playing' I did within Picasa3 a short while ago - I thought it suited the title I had in mind.

The title was cut on the Cricut (yey...it's getting used) using the George & Basic shapes cart. I cut the letters in a very similar colour to the background PP and then cut a shadow in white. The lace circles are paper doilies that I got from Poundland. The back one was brushed with "Broken Glass" distressed ink and the top one left plain.
The red flowers were a mix of paper blooms and dimensional stickers. Silver coloured brads were used in the centre of the paper blooms so that they co-ordinated with the stickers. The journalling was written on a punched oval that had been edged with the "Broken Glass" colour.
The red flowers highlight the fact that only Santa remains in colour in the photo. The icicles were hand cut from white glitter card and stuck just behind the bottom of the photo.

There is quite a bit of bling on this LO. Red gems have been used to continue the red highlights and ice blue gems have been arranged in swirls to give a bit of sparkle without standing out too much.

Oh, and why that title...well knowing my limited techiness with PCs I thought it was magic that I had managed to achieve the combination of B&W with a spot of colour......................

A bit of cheer...

...to brighten the day.
I love flowers - I'm not very good at arranging them but I do love a vase of pretty blooms.

It is nearly the end of January but it seems as if we have plunged back into the depths of winter - minus temperatures, bitter winds and dull gloomy skies. Nothing at all to bring a smile to the face or cheer to the heart...

So when I saw some pretty flowers in Tesco this morning I just had to treat myself. Although I am not a great lover of 'pink' I do love flowers in shades from white through to red with all the shades of pink in between. The white tulips looked so clean and fresh and the pink carnations a gentle splash of colour on a dull day.

I remember as a child spending many hours in the garden with my Granddad who was a very keen gardener. I would watch him tend his beds and look after the flowers. Tulips and daffs were a sign of spring and better weather on the way whilst carnations and pinks were a staple of colour providing a scent to compare with no other. Granddad always had a huge variety of flowers in his garden - roses, lupins, snapdragons, sweetpeas, carnations, pinks, hollyhock and so many more...

Flowers mean colour & cheer to me. I might not be much of a gardener but I will always thank my Granddad for my love of flowers.........................

Saturday, 29 January 2011

And they call it...

...Puppy........hug

(sorry, I know that is terribly corny)
I know you are all sitting there groaning at that awful post title but I had to go-with-the-flow...for some reason Donny Osmond's "Puppy Love" was playing in my mind whilst I sat stitching on the buttons - sad, isn't it LOL
I found these buttons yesterday quite by accident and they reminded me of my friend Lucy's blog where she has a widget to show a different dog piccy (I think it changes daily). Unfortunately there was only one pack so unless I can find another pack somewhere there isn't going to be a cosy to match...shame 'cos I think these buttons are real cute...
There was no problem doing a matching coffee pot hug for this one - I had plenty of buttons - set & match to the dots.................................

Before you get excited...

...this lovely creation is not mine.

Andy at Pinnacle Crafts made this lovely box card for a lady we all know as French Lin - there are more pics over on his blog and he has even kindly given a Step-by-step tutorial on how he made it.

Whilst in the shop yesterday Andy commented that we would be making something along similar lines next weekend during our "Tim style" class...so I have been warned LOL It will be a very messy day so no light coloured clothing - pinny is packed and I just need to dig out the new latex gloves..............................

Friday, 28 January 2011

Member's Weekend...

...at Pinnacle Crafts.

Today was the start of the first members weekend of 2011 and with 30% offmost stuff (some restrictions) it was a great excuse for booking a day off and having a long weekend.

Despite getting to Barleylands early the shop was already heaving...these weekends are always well attended.

I picked up a few sets of new stamps - treating myself to two sets of Joanna Sheen's House Mouse stamps (I saw the "Ice Cream" set used on some cards in a magazine this week and I fell in love with the images). I also treated myself to a couple of the new Core'dination embossed cardstock packs and I finally got hold of Sir Tim's stack "Lost & Found"...I know it has been around for a while but I've never been able to get hold of one until now.

So some lovely bits to play with but I'm going to have to be good. I haven't put a pic on here because if I see the stuff I'll want to play...and really I do have a lot to do over the next few days so I'm saving them.

After all the rain that we have had over the last couple of weeks it now seems to have decided to stay dry for a bit but boy is it cold. This morning even saw some of the dreaded white stuff but it was gone in the blink of an eye - good job too! I really don't want to be contending with those weather conditions all over again especially as I have a 'Tim style' class to attend over at Pinnacles in a week's time. The last time I went there in the snow it decided to start coming down again and it took me 2.5hrs to get home...I think I'd rather have the rain - at least it feels a bit warmer when it is wet.................

Thursday, 27 January 2011

Dotty for...

...hugs!

Being back at work has meant the knitting has slowed down a bit **sigh** and my knitting basket has been sitting there giving me evil looks LOL

To be honest, the Christmas holiday and the luxury of being able to spend time crafting seems so long ago (three weeks LOL) and what with the commuting and the hassle of all the changes going on at work I really didn't feel like sitting knitting - which seemed such a shame as I had been really enjoying it.

Last night I decided to get the needles out and make an effort and tonight I stitched the finished item...
...a cream hug with pastel button dots.

Mum picked up some packs of buttons at her local 99p store for me so I really have no excuse - I have plenty of yarn and now I have a good selection of buttons to last me...well at least for a little while.

I rather like the cream yarn so I might have a bit of a play and make some more hugs but with different colour decorations. Hope the clicking of the needles doesn't disturb you........................

Tonight was a...

...Chip night!
Why a chip night...well because; the journey home was awful, the weather has turned bitterly cold and I just wanted something hot to hold whilst I walked home from the station.

Nuff said.........................

Wednesday, 26 January 2011

Peel-offs...

...a love/hate relationship?

There are many things in crafting that crafters either love or hate and I think 'peel-offs' fall into that category.

My friend Lucy "hates" them...even though after one of Andy's inking lessons she said that they 'didn't look bad...for peel-offs' LOL

I think I 'sit on the fence' on this topic. There are some things I wouldn't let a peel-off near in a month of sundays and then there are some things that they are the perfect solution for.

When my niece asked ever so nicely if I could make her wedding invitations in 2009 I was only too happy to help out - then she dropped the bombshell that I wouldn't have that long to get them done. The design was quite simple but time consuming as the linked hearts that she wanted were stencilled directly onto the card and seemed to take forever to dry. She wanted the wording directly on the card too, so with this in mind I didn't want to risk stamping onto the card and doing it wrong - peel-offs were the answer. I found "Wedding Invitation" in a lovely type style and sat with a ruler and my pokey tool placing them in the correct position - fiddly but oh so much safer.

There are other times when a stamped sentiment is really the only way to go and I will normally stamp onto a separate piece of card (just to be safe LOL) and matt/layer as need be. So for me there are occasions for and others against the use of peel-offs.

Tonight I was having a bit of a rummage through my stash and I found a couple of hand made paper cards that I had forgotten that I had. I wanted to add 'something' but didn't want to detract from the prettiness of the paper...so I reached for the peel-offs...
Being handmade paper the cards are a bit more suitable for 'notelets' as they are not likely to stand-up well. This was another reason for keeping embellishments to a minimum as the added weight would be too much.
A few scattered silver hearts...
...and a slight variation on the theme and I have two pretty notelets ready for use.

On this occasion - peel-offs were the way to go..................

Can I just...

...put everyones mind at rest.

I didn't evict the budgie to take the pics of the caged Cricut LOL

Until a year ago I did have a parakeet who sadly 'returned soul to maker' but this was not his cage - it was supposed to be but the little darling **rollseyes** decided he didn't like it and sat in it screeching until we put him back into his original...the base had cracked on the first cage and you can't buy just a base (hurumff) so it was a good job the the new base fitted the old wire part of the cage otherwise we would have had real fun & games...

The cage for the pics was dug out from the cupboard - see, told you I was a horder LOL.................................

Monday, 24 January 2011

Time to play...

...with my Cricut.

...and this is what I came up with...
The word "Kiss" is from the limited edition cartridge Love Shack and was cut at 4inches.

Now all I need to do is find all the other cartridges that I put away for "safe keeping" whilst my 'bug' was confined to its box LOL....................

Sorry but...

...the Devil got me LOL

After seeing Dan's comment on the previous post I just had to respond with some piccies...
Bell...
Mirror...

...well I had to...didn't I LOL................................

Sunday, 23 January 2011

Hey Andy...

...you will be so proud of me LOL

MY BUG HAS A HOME!!!

Here's the picture to prove it...
In an earlier post I mentioned that my Baby Cricut hadn't been used for some time and the main reason was because I didn't have anywhere for it to 'live'...so it stayed in its box - out of sight, out of mind.

Today I attended the class that I told you about. It is amazing what a couple of hours with someone as enthusiastic as Andy is about Cricuts can do for one's confidence when it comes to utilizing gadgets like this.

I had only ever used my 'bug' for the very basic of tasks but after two hours with Andy I have actually learnt what some of those other buttons can do LOL I have also learnt some tips/workarounds for my little bug as it obviously does not have all the functions that the newer models have - don't care...I am very happy with my bug and now that it has a home I promise to make use of it..................

Altered...

...but not exactly art LOL

As crafters we sometimes worry about acquiring too much clutter and I have to hold my hand up and say that apart from being stash obsessed I am also a hoarder - I don't like to let things go...

However, in an effort to cut down on the clutter we sometimes overlook potential.

This little case started life as a childs version of a picnic basket - you know the sort of thing...dolly size cups plates & napkins etc so that Dolly and friends can have a picnic or tea party. This wicker case was destined for the bin because the contents had been lost or broken. Mum saw it and knew that I liked baskets and stuff but to be honest...whilst I loved the case my first thought was "what am I going to do with that!". It could sit on the shelf in the sewing room and gather dust or I could actually do something with it.
So I did something with it...

Some leftover Christmas fabric and a bit of braid & wadding and the outside of the basket was covered - if I made another, I think I would spend a bit more time on the base and make it look a little more 'tidy'. Okay, so the outside was 'tarted-up' but what was it going to be used for - it was going to live in the sewing room so I made a sewing basket.
A piece of stiff card cut to fit inside the lid was covered with fabric and some elastic stitched in place to hold things like the tape-measure, a needle case, scissors, thread and yes...the dreaded thimble LOL There is just something in me that can not have a sewing basket/box without a thimble (even though I hate the things) it just wouldn't seem right.

I'm not sure what you call them but I think they have a specific name...a pin cushion that combines with a thread storage...I made a hexagonal one. I think I was paying more attention to getting the shape right and could have done with a bit more stuffing in there - never mind.

The base of the basket was lined with fabric and there are a couple of pockets round the sides to poke stuff into.

I was surprised just how much I could actually put in this little basket.

So "Waste not, Want not" is a good motto - the basket found a new purpose in life, I used up some bits of fabric/braid/wadding that would probably have sat in the drawer for ever & a day and I now have a cute, handy little sewing basket..........................result!!!!

Saturday, 22 January 2011

One Stroke painting...

...and a little pink teddy.

I thought you might like to meet the little pink teddy that I created using a painting technique called 'One Stroke'. It is a technique that was made very popular for home decor by a lady called Donna Dewberry who used to visit QVC here in the UK quite regularly. She showed how easy it was to create wonderful lifelike flowers by loading the paintbrush with more than one colour and using different types of strokes. As an extention to this she also showed how to create a fluffy look for things that were furry...
Little pink ted was created using a small hoof shaped stippling brush to give that patchy fluffy look.
Pink ted lives on a tissue box cover that I made for the bedroom. The cover is one of those papiermache bare boxes that you can pick up at lots of craft outlets (especially chains like HobbyCraft and The Range). It was base coated with acrylic paint in Soldier Blue.
The lid was decorated with two corner clusters of rosebuds and leaves. The stroke used to create the rosebuds requires a small flat brush to be double loaded with paint - in this case, pink one side and white the other. The stroke is a sort of 'c' shape...one the right way and one the wrong way to form a tube. The leaves use a round brush - double loaded and you sort of splodge, drag & pull up (very much technical terms those...LOL)
I decorated the other sides of the box with a variety of flowers, leaves, trailing bits and buds. I'm not sure what you would call the large pink flower but it was quite pretty and was created using a cluster of the rosebud shapes.
The daisy uses a double loaded round brush and the stroke is a bit like a splodged teardrop shape drawn in towards the centre of the flower and then the centre is stippled over the top.

I can remember spending loads of time at a 'One Stroke' class practicing the various stroke shapes on scrap paper until they looked right - it seemed such a chore at the time but it was worth it because it really does make a difference to how the images come out............................

Friday, 21 January 2011

Exploding boxes...

...or are they?

Scrapbookers often make what we call 'Exploding boxes' as a different method of displaying photos - especially if they want to make a gift for someone.
It is something a bit different from the usual photo album for granny or the framed picture for great aunt Bess. It can be decorated in any way to suit the occasion and has the advantage of actually looking like a gift...
The surprise comes when the lid is taken off and the whole thing flops open to reveal boxes within boxes that can hold lots of photos and little messages from the 'giver'. Some folk put a small fixed box in the middle to hold a token or gift...

But this is not a new idea.

Especially popular during Victorian times, boxes of this type were made - sometimes just for decorative purposes but mostly for quite practical reasons. A good many Victorian ladies would have their own Etui - decorative/ornamental box - and inside would be their workbox...needles, pins, threads etc.

A little while ago I saw some of these at a craft show and decided to have a 'play'.

My box is made from stiff card panels and is covered in fabric. The lid was padded with some wadding so that I could use it as a pin cushion.
When the lid is removed the box flops open to reveal a selection of sewing necessities. Using this 'exploding' design, it is surprising just how much you can fit into quite a small space. The tiny little fixed box in the middle provides a perfect home for the thimble (not sure why I bothered with this because I've never used a thimble in my life - can't get on with the things LOL)

I think Etui boxes are a lovely idea and could be used for lots of purposes other than needlework - a box for the dressing table containing make-up bits-n-pieces or even a little jewellery box (the panels could hold quite a few pairs of earrings) - they can be as plain or as decorative as you want to make them and obviously make super gifts.............................

I have a confession...

...I've not been using my Cricut.

**SHOCK..HORROR..NEVER** I can hear your amazed cries echoing through cyberspace.

Let me explain...

My craftroom hasn't been accessable for some time as it has become a dumping ground for stuff that should be up in the loft. As a result, I do most of my crafting at the desk in the study or on my lap in the lounge. This means I only have limited space available for my crafting equipment.

My BigShot is out and sits on the floor next to the printer. My BIA sits by the desk in its pretty little bag but with the PC, printer, modem and a fax on the desk there is no room to leave my Cricut set up.

As with most things that are kept in their boxes it tends to be 'out of sight, out of mind'.

In an effort to rectify this, I have booked myself onto a lesson at Pinnacle Crafts with Andy so that I can learn more of the functions that my little bug can do and hopefully this will encourage me to either get it out of the box more often or try and re-arrange the study. Should be interesting...........................

Wednesday, 19 January 2011

A bit of altered art...

...and some decoupage.

I don't mean the type of decoupage that you do for cardmaking...you know, the layering up with foam pads/silicon glue etc.

NO!!! I mean the sort that I learnt at school - cut out pictures glued to a surface, edges sanded so they didn't stand too proud and a good couple of coats of PVA or varnish depending on the item and what it was going to be used for.

Here are a couple of items that I made using paper napkins to provide the decoupage...

The watering can started life as a cheap tin item that I first of all base coated with a mixture of acrylic paint and multi-surface medium (stops the paint flaking off). The urn was bisqueware that was painted and stippled to create a base coat.
The design came from some napkins that had a bramble design on. These napkins happened to be 3ply and once the design was cut out I carefully separated the top layer and applied the pattern to the watering can and urn using some watered down matt ceramic varnish.
Once I was happy with the placement of the napkin cutouts, I extended the design with hand-painted stems and leaves...
Once everything was completed the urn was sealed with matt ceramic sealer and the watering can was finished with a semi-gloss varnish.

At the time I loved playing with the technique but wasn't overly keen on the actual pieces. I suppose over time they have grown on me LOL......................

Tuesday, 18 January 2011

Ceramic Art...

...was a craft I mention that I fell in love with back in 1998. I have to say that I miss the creativity of it but certainly not the cost...yes I know that I probably spend a small **cough** okay, quite large amount of money on my papercrafting but that is through choice and it is possible to make some lovely stuff for next-to-nothing when I want to.

With ceramics there was a set cost for the initial piece and then you would have to factor in the cost of your classes for however many weeks it took to complete - if you were making something using a new technique it could work out very expensive as obviously it would take time to get to grips with that technique. Such is life.

Here are some pics of a piece I made using a medium and technique that became one of my favourites.

This piece was made as a music box with one of those press button things on the back that played a tune (it seems to have given up the ghost after all this time). I decided to make it because I wanted it for my 'sewing room'...don't laugh, what I casually refer to as my craft room - that room that has become the household dumping ground - started out as my sewing room and I actually used to do sewing up there LOL Anyway, I digress. I wanted something themed to put in my sewing room and this piece took my fancy.
The medium used was a paint called Dona's - unlike ordinary acrylic stains/paints you don't paint it on you dry brush the piece to gradually build up the colour and it doesn't need to be sealed with ceramic spray/varnish as the aim is to finish up with a matt, almost chalky looking finish.
Varnish can be used to 'gloss-up' areas like the buttons - much in the same way that Glossy Accents can be used to add gloss/shine to a paper crafted item. But the main point of the technique is that you start with a piece that you basecoat and then 'antique' - as you add colour to the piece you are aiming to keep quite a bit of the base/antique layer showing as this is what creats the texture & depth of the piece.
Everything is hand painted - there are no transfers - everything is given life by the application of the colour.

This is one of the few pieces that I have left (3 years ago a lot of my bits got broken **sob** and there was never going to be a way to replace them) and unfortunately, not many of my surviving pieces are in the Dona's finish. I went through a phase of making musical pieces...a couple of scarecrows sat under a sunflower...a pair of snow folk under a poinsettia - both of these you turned the flower to wind-up the music box...and I also had a boy & girl teddy sat on a rotating base...sadly these all got broken and I didn't even have any photos of them.

My remaining pieces are in cabinets and are treated with the upmost care as I really wouldn't want to lose any more of my treasures.........................

Sunday, 16 January 2011

Busy weekend...

...and far too short boohoo

Half way through January already - an indication that 2011 isn't going to be any slower than 2010.

On Saturday I popped over to Barleylands to pick up some more cupcake buttons and have a bit of a wander.
There is a little shop at Barleylands called Molly Moo's and they do some lovely bits and pieces of home decor. Their style is folksy, distressed, antiqued all the things that I love. They had a new item in there that I'm sure would appeal to Annette (Voodoo Vixen) as she has a bit of a thing for birdcages.

This is being sold as a memo board - it is approx 3ft tall and about 18ins wide and bows out approx 2ins. The metal has been given a 'rusted' finish. As you can see, items can be attached to the bars using pegs. I really like this but I'm not sure I have anywhere it could be located...if they still have it by payday I might have thought of somewhere LOL
Well I said that I went to Barleylands to get some more cupcake buttons and I did - in two different sizes this time. So today I finished off the tea cosy that I was knitting to match the mug hug that I posted a couple of days ago. As you can see from the photo I now have another matching, completed set. These buttons are so cute.

So as another weekend bites the dust I'm thinking about getting stuff ready for work tomorrow (hurumff) a nice lottery win would be so useful right at this moment LOL...still, work enables me to craft so I should be thankful (still think a lottery win is a much better idea though LOL)..................................

And the Winner is...

...drum roll please.

What?

You were expecting one of those electronic random, number, thingy, wotsits...pleeeeeeeeeeeeeze this is me you are taking about LOL

I did say names would be pulled out of a hat...
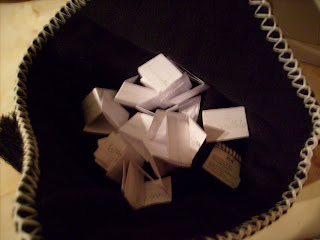
Here's the hat...
These are all the tickets in the draw...
and the winner is - Winnie **big smile**

Winnie, if you pop over to my profile you will find my email - if you would drop me your address I will get your 'hugs' in the post to you.

Thank you to everyone who took part - your comments were lovely and your support is much appreciated

BIG CYBER HUGS TO YOU ALL

Just a little freebie...

...to help me celebrate 4 years as a blogger and over 500 posts.

December 2006 I finally gave in to the 'nagging' of Nicola Clarke (LOL) who used to run our Thursday night crop and created this little bit of cyberspace for myself.

I have to say it took a while to get to grips with even the basics (not sure I've grasped everything even now...heehee) Oh the nightmare of trying to work out how to get a pic actually "in" the post - I know, all so easy once you realise what that postcard type button is for...and don't even mention links & things (something I'm still not overly brilliant at).

Anyway I digress..."what about the freebie" I hear you all ask.

Just to mark the occasion I have decided to give away one of my 'hug' sets - Buttons & Bows...
The lucky winner will be sent the mug & pot hugs shown in this picture. Just a little something to say thank you for helping me celebrate that I have actually kept this bloggy thing going.

So what do you have to do - easy really, just leave a comment on this post. If you would like to become a follower that would be nice too. But please folks, only one comment to go into the hat for a chance to win this set.

There is a way for you to get a second entry in the draw and that is to place a link on your blog to spread the word - feel free to copy the pic here for your blog post if you so wish.

The draw will take place on Sunday 16 January.

Right, now I'm off to see if I can make this post stay at the top...this could be interesting LOL........................................

Don't Forget...

...today is your last chance to go into the 'freebie' draw.

I've a lot to do today so I will be drawing for the 'hug set' later this evening (UK time).

If you meant to drop by and leave a comment you still have time...................

Friday, 14 January 2011

Do you remember when you...

...became a Crafter???

Realising how long I had managed to maintain this blog made me stop to think about my crafting. To be honest, I don't really remember a time when I didn't craft in some shape or form and the more I thought about it the further back I could remember bits and pieces...one of my earliest memories was creating what I suppose we would call a minibook now (yep Annette, I think you rekindled a spark that had first put in an appearance when I was about 4 or 5 LOL).

Growing up, my Dad's job took him away from home a lot so I can remember Mum helping me to make cards for him to take with him or to welcome him home with...I seem to recall lots of bright & shiny 'lick & stick' shapes stuck onto folded bits of paper. However the thing that came to mind was a little book that I made all by myself as a surprise. I know I could read and write before I started school but I'm sure my writing skills would have been very basic. I remember using quite a few sheets of Mum's writing paper (I'm sure that didn't go down well **chuckle**) and folding pages to go together to make the book. There were pictures that I drew - not sure what but probably flowers, houses, cars, people - and page after page of writing...well, what I thought of as writing. In reality, I created page after page of 'scribble' thinking that it was "grown-up writing" - the joined-up stuff LOL I remember feeling so proud of my efforts but I don't think Mum was so enthusiastic about my wasting all those sheets of paper.

Over the years I've tried many different crafts - knitting started at Infant school age when I got one of those little moulded paper baskets with a set of plastic needles and some small balls of yarn...I thought I had the best dressed Penny Bright doll ever (amazing what you can make out of garter stitch squares) - crochet started at Junior school age along with embroidery...anyone remember 'iron-on' transfers for embroidery? Alongside this was my drawing, I loved to draw but was never keen on painting (too messy LOL)

Senior school saw me dressmaking and making soft furnishings - my bedroom had a lovely collection of "Donny Osmond purple" cushions.

In fact over the years I've dipped in and out of most of these crafts when the fancy took me and card making has popped up on and off along with some very basic scrapbooking type efforts (although I didn't know that was what it was called). Embroidery gave way to Cross-stitch and then in 1998 I discovered ceramic art...

I loved this. The fun of bringing a piece of fired bisque to life with a selection of colours was amazing and I couldn't wait to go to class each week to carry on with my chosen piece. Unfortunately, costs started to get out of hand and things started to go wrong with the class organisation so that came to an end. But they say when one door closes another opens...one lady from cermaics had a daughter living out in the USA for a while and during her visits she had found 'Scrapbooking' - she invited me along to a crop that she had found locally and as they say - that was it. I was hooked. Scrapping has brought with it a love of making minibooks/albums and encouraged a revival of my card making.

About 18months ago I discovered Promarker & Copic pens and this has brought back my love of colouring in.

I'm going through a knitting phase at the moment - I've always loved to 'play' rather than follow a pattern blindly.

So back to my original question (yes, I know it was ages ago LOL) do you remember when you became a crafter - did you start young or have you come to it only as an adult? I'd love to hear about what got you started and what you've had a go at................................................

Thursday, 13 January 2011

I promised...

...so here they are.

These are the last of the U.F.O.s that I found with my yarn stash - now all finished.

This orange and green one is quite bold and bright but a friend pointed out that not everyone likes sticking to the traditional white/pink/blue/lemon shades these days.
A couple in slightly more traditional colours, although not pale pastels.
I fell in love with this yarn and whilst it possibly isn't the most practical of yarns to use for a baby I think it is lovely for a special occasion outfit such as at Christmas time.
I'm sure I have loads of 'bits' of knitting hidden away but these were complete apart from the finishing off (I have bits of sleeves, half knitted fronts etc. many where I was playing with a pattern idea or colour combinations).

At least these are done so I can continue playing with my 'hugs' & cosies without feeling guilty LOL..................................

Wednesday, 12 January 2011

Trying to be good...

...and keep motivated.

Whilst looking through my knitting yarn stash earlier this evening I came across a bag of unfinished items. They were all the bits for a lot of baby cardigans that I was knitting last year before I made a start on the scarves I gave as Christmas presents.

I decided if I didn't fancy knitting this evening perhaps I could at least stitch some of these together and get them done - so that's what I've done.

Here are some that I've finished (I should have some more pics to post tomorrow evening).
This set only needed a couple of buttons stitched on to finish it off...don't know why I didn't do it at the time **rollseyes** I must have been distracted by something else (probably some new item that I wanted to play with there and then LOL). Most folk who know me know that I can easily be distracted by a fancy new yarn, some new craft tool or pretty PPs - very fickle LOL
These two just needed the sleeve & side seams done and the buttons stitched on - sorted.

So now I'm feeling a little bit smug that I have actually got some of my U.F.O.s dealt with...**gives halo a quick polish**...and quite timely too as I have a colleague at work who is expecting a baby at the beginning of March. No-one knows what the sex is so my selection should ensure that I have at least a couple that will be suitable.

Do I do a couple of rows of the tea-cosy or do I toddle off to bed?...think bed will win....................................